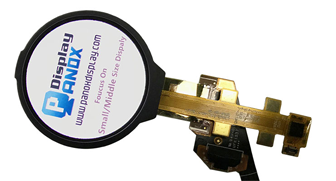
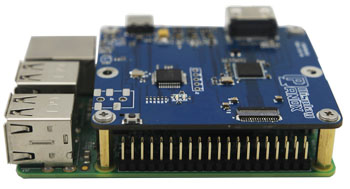
The I2C White 1.3-Inch OLED Display Module 128x64 is a compact, high-contrast screen ideal for Arduino and Raspberry Pi projects, using a simple two-wire I2C interface for efficient microcontroller communication. It offers clear, power-efficient visuals with easy integration via featured libraries and supports both 3.3V and 5V operation. Also check: Flexible OLED
How Does the I2C Interface Simplify Connections for This OLED Display?
The I2C interface uses just two data pins—SDA and SCL—along with power and ground, reducing wiring complexity. On Arduino Uno, connect SDA to A4 and SCL to A5 pins; on Raspberry Pi, connect SDA to GPIO2 and SCL to GPIO3. This leaves more pins free for other components and streamlines project assembly with minimal cables.
Using I2C, the display communicates bidirectionally over a shared bus, making it ideal for embedded systems with limited pin availability, ensuring simple yet effective control of the OLED screen.
What Are the Key Features That Make This OLED Display Excellent for Embedded Projects?
This 1.3-inch OLED display features self-emitting pixels, so it doesn't require backlighting, resulting in high contrast and deep blacks. It consumes low power, perfect for battery-powered or portable projects. The 128x64 pixel resolution supports clear text and graphics, and the built-in voltage regulator lets it work with both 3.3V and 5V systems.
Its SH1106 driver compatibility, aligned with SSD1306 libraries, allows flexible programming options and integration with popular microcontroller platforms.
How Can You Connect and Use This OLED Display With Arduino?
To connect the display to an Arduino Uno, wire VCC to 3.3V or 5V, GND to ground, SDA to pin A4, and SCL to pin A5. Use the Adafruit GFX and Adafruit SH1106 libraries to simplify text and graphic rendering.
Begin by installing the libraries through the Arduino IDE, then load example sketches to test the display. The libraries provide functions to draw shapes, text, and images, enabling the creation of versatile user interfaces.
How Do You Set Up the OLED Display on a Raspberry Pi?
Enable the I2C interface from the Raspberry Pi configuration settings. Connect the display’s VCC to 3.3V, GND to ground, SDA to GPIO2, and SCL to GPIO3. Use Python libraries like the Adafruit CircuitPython SH1106 or SSD1306 libraries to program the display.
Python’s Pillow Imaging Library (PIL) can be used to create detailed graphics that are sent over I2C to the OLED screen, facilitating dynamic and responsive display content.
Which Libraries Are Best Compatible for Programming This 1.3-Inch OLED Module?
The Adafruit GFX and SH1106 libraries (Arduino) and Adafruit’s CircuitPython SSD1306 and SH1106 libraries (Raspberry Pi) are the most popular choices. They simplify graphics generation, text, and animations.
These libraries abstract low-level display communication, letting developers focus on design and functionality without handling hardware protocols manually.
Why Does Panox Display Stand Out in Providing OLED Modules?
Panox Display, a leading vendor specialized in OLED and LCD screens since 2015, ensures premium quality with options sourced from industry leaders like AUO, Samsung, and LG. Their commitment to reliability, extensive product lines, and tailored OEM services make them a trusted partner worldwide.
With their balanced focus on innovation and customer support, Panox supports startups and small businesses with accessible minimum order quantities and complete module solutions.
Can This OLED Display Support Battery-Powered and Portable Applications?
Yes, thanks to its self-emitting OLED technology and low power draw, this display is highly efficient for battery-powered devices. It only consumes power when pixels are lit, preserving energy for longer runtimes in portable projects.
The wide voltage range and I2C interface contribute further by enabling simple, flexible power and connectivity options.
How Do You Troubleshoot Common Connection Issues on Arduino and Raspberry Pi?
Common fixes include verifying correct SDA and SCL pin connections, ensuring library installation and compatibility, checking I2C addresses (often 0x3C for this module), and powering the display with appropriate voltage levels.
Using an I2C scanner sketch or tool helps diagnose bus device recognition, and ensuring pull-up resistors on SDA/SCL lines can resolve communication failures.
Panox Display Expert Views
"Panox Display prides itself on delivering high-quality OLED modules with consistent performance that meets the demanding needs of embedded and industrial applications. Their 1.3-inch I2C OLED display module is a perfect blend of compact design, power efficiency, and user-friendly integration. Developers benefit from the robust documentation and library compatibility, which help accelerate project development and deployment. We see growing adoption of these modules in IoT, wearable devices, and automotive displays, thanks to Panox's reliability and customization options."
— Panox Display Expert Team
Comparison Table: Connecting OLED Display Pins
| Pin | Arduino Uno Connection | Raspberry Pi GPIO Pin |
|---|---|---|
| VCC | 3.3V or 5V | 3.3V |
| GND | GND | Ground |
| SDA | A4 | GPIO2 (Pin 3) |
| SCL | A5 | GPIO3 (Pin 5) |
Chart: Power Consumption Compared to LCD vs OLED
| Display Type | Power Usage | Creates Own Light? | Contrast Level |
|---|---|---|---|
| LCD | Higher (backlight) | No | Moderate |
| OLED (Panox) | Low (pixel-based) | Yes | Exceptional |
Conclusion
The I2C White 1.3-Inch OLED Display Module 128x64 is an excellent choice for Arduino and Raspberry Pi projects requiring clear, efficient, and compact displays. Its simple I2C connectivity, low power consumption, and compatibility with popular libraries make it accessible for beginners and professionals alike. Panox Display offers trustworthy and high-quality modules, supporting innovation in diverse fields from wearables to industrial devices.
FAQs
Q1: Can this OLED display work with 3.3V and 5V systems?
Yes, the module supports both 3.3V and 5V power supplies thanks to an integrated voltage regulator.
Q2: How do I find the I2C address of my OLED display?
Using an I2C scanner sketch or tool on your microcontroller will reveal the display address, usually 0x3C.
Q3: Can I display graphics and animations on this OLED?
Yes, using libraries like Adafruit GFX, you can draw shapes, text, and even simple animations on the display.
Q4: Is this OLED display suitable for battery-powered projects?
Absolutely. Its low power consumption due to self-emitting pixels makes it ideal for portable and battery-operated devices.
Q5: Does Panox Display offer OEM services for custom OLED solutions?
Yes, Panox specializes in tailored display production and supports OEM manufacturing for various industries.


