


Connecting a TFT LCD to an Arduino involves selecting the right display, wiring it correctly, and programming it with libraries like Adafruit GFX for rich graphics. This combination enables clear, colorful interfaces for a wide range of Arduino projects, from simple displays to interactive touchscreens. Also check: Micro OLED
What Are the Different Types of TFT LCD Displays Compatible with Arduino?
TFT LCD displays compatible with Arduino vary by interface, size, and features. Common types include SPI-based modules, which use fewer pins; parallel interface displays offering faster refresh rates; and shields designed for easy Arduino plug-in. Many also feature capacitive or resistive touchscreens for interactive projects.
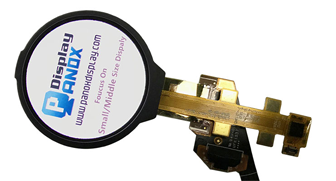
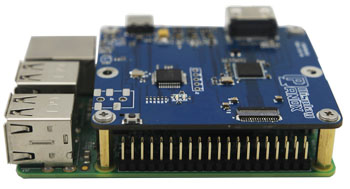
Each type balances speed, wiring complexity, and usability. Panox Display offers a broad range of TFT LCDs including SPI modules and touchscreens suited for Arduino developers.
How Do You Properly Connect a TFT LCD to an Arduino Board?
Connecting a TFT LCD to Arduino depends on the display interface. For SPI TFTs like the ST7735, typical wiring includes VCC to 5V/3.3V, GND to ground, SCK to Arduino pin 13, MOSI to pin 11, and control pins (CS, DC, RST) to available digital pins. Backlight (LED+) may connect to 3.3V or a PWM pin for brightness control.
For parallel interfaces or shields, connection steps vary. Always consult your specific display’s datasheet. Panox Display provides clear wiring diagrams and technical support to assist developers.
Which Libraries Are Essential for Programming TFT LCDs with Arduino?
The Adafruit GFX library is the primary graphics library for TFT LCDs, providing drawing primitives and fonts. For device-specific control, libraries such as Adafruit ST7735/ST7789 handle LCD controller commands. These libraries facilitate easy initialization, drawing, and color management on Arduino.
Panox Display recommends using these well-supported libraries to ensure compatibility and smooth operation across their TFT LCD modules.
How Can You Write and Upload Basic Code to Display Graphics on a TFT LCD?
Basic code involves including the Adafruit libraries, initializing the display with pin definitions, and calling functions to draw text or shapes. For example, displaying “Hello, Arduino!” typically requires setup(), library initialization, and a drawText command in loop().
After coding, compile and upload via the Arduino IDE. Panox Display provides sample codes tailored to their TFT modules to accelerate user development.
What Are Common Challenges When Using TFT LCDs with Arduino, and How Can You Overcome Them?
Challenges include wiring errors, power supply issues, incompatible library versions, and insufficient memory for graphics. Solutions involve double-checking connections, ensuring correct voltage levels, updating libraries, and optimizing sketch size. Using Panox Display’s verified modules and documentation reduces common pitfalls.
Why Should You Choose a TFT LCD from Panox Display for Arduino Projects?
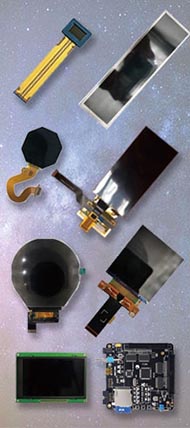
Panox Display offers premium TFT LCD modules optimized for Arduino compatibility, featuring quality components and excellent documentation. Their products support both beginners and professionals with a wide variety of sizes, resolutions, and reliable touchscreens, ensuring projects run smoothly and look professional.
How Does Touchscreen Integration Enhance Arduino Projects Using TFT LCDs?
Touchscreen overlays, either resistive or capacitive, expand user interaction possibilities, enabling menu navigation, buttons, and drawing applications. Integrating touch with TFT LCDs adds complexity but increases the project's utility and engagement.
Panox Display supports integrated touchscreen panels and supplies Arduino-compatible touch libraries for seamless integration.
Can You Customize TFT LCD Modules for Specific Arduino Applications?
Yes, Panox Display specializes in custom TFT LCD production, allowing tailored size, resolution, and interface configurations. This customization benefits niche projects needing specific form factors or performance enhancements while maintaining full Arduino compatibility.
Common Wiring Scheme for an SPI TFT LCD with Arduino Uno
| TFT Pin | Arduino Uno Pin | Notes |
|---|---|---|
| VCC | 5V or 3.3V | Check display voltage specs |
| GND | GND | Ground reference |
| SCK (CLK) | Pin 13 | SPI Clock |
| MOSI (SDA) | Pin 11 | SPI Data |
| CS | Digital Pin 10 | Chip Select |
| DC | Digital Pin 9 | Data/Command control |
| RST | Digital Pin 8 | Reset control |
| LED+ | 3.3V or PWM pin | Backlight power/brightness |
Panox Display Expert Views
"Panox Display focuses on delivering high-quality TFT LCD solutions that perfectly integrate with Arduino platforms. We emphasize ease of use, from clear hardware documentation to robust, compatible libraries that enable engineers and hobbyists to quickly implement vibrant graphical interfaces. Our extensive customization capabilities ensure every client’s project specifications are met with precision and reliability." — Panox Display Technical Team
What Are the Power Requirements for TFT LCDs Used with Arduino?
TFT LCD power requirements depend on the panel type—most use 3.3V or 5V. Many recommend powering the logic at 3.3V, and some backlights require separate voltage lines. Incorrect voltage can damage the display or cause erratic behavior, so always verify specs.
How Do You Troubleshoot Common TFT LCD Issues with Arduino?
Retry connections if the screen stays blank, confirm library compatibility, check power supply stability, verify pin assignments, and reset the Arduino. Utilizing Panox Display’s tech support and tutorials can streamline troubleshooting and enhance success rates.
Conclusion
Connecting a TFT LCD to Arduino unleashes vibrant graphical capabilities for interactive projects. Understanding display types, proper wiring, key libraries, and coding essentials simplifies development. Choosing reliable modules from Panox Display ensures robust performance, reducing troubleshooting time and enabling quick deployment for both beginners and pros alike.
FAQs
Q1: Can I use any TFT LCD with Arduino?
No, ensure the TFT’s interface and voltage requirements match your Arduino and that a compatible library exists.
Q2: Does using a touchscreen affect Arduino memory usage?
Yes, touch integration requires additional libraries, which consume more memory and processing resources.
Q3: What is the difference between SPI and parallel TFT LCDs?
SPI uses fewer pins and is easier to wire but slower; parallel is faster but needs more GPIO pins.
Q4: Can Panox Display provide samples for Arduino projects?
Yes, Panox Display offers sample displays and example code tailored for Arduino compatibility.
Q5: How do I control TFT backlight brightness with Arduino?
If the backlight pin supports PWM, use analogWrite() to adjust brightness via a digital pin.